Circuit Breaker
What is a Circuit Breaker?
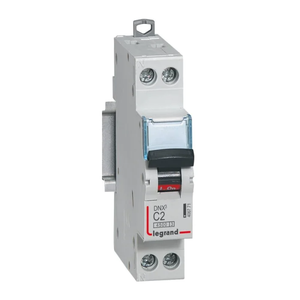
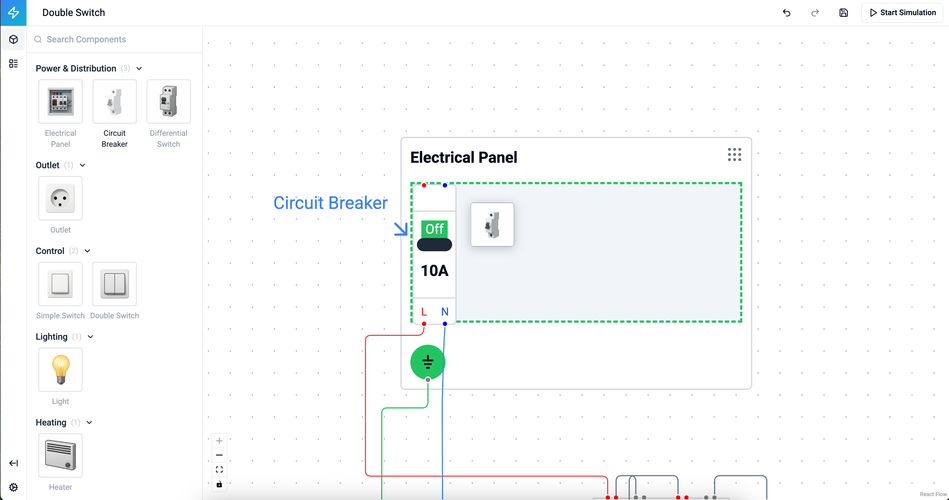
Section titled “What is a Circuit Breaker?”A circuit breaker is a safety device that automatically cuts off electrical power when it detects too much current flowing through a circuit. Think of it as a reusable fuse that protects your wiring and devices from overheating or damage. In Elecplanner, circuit breakers are placed inside electrical panels to protect individual circuits (like lighting, outlets, or appliances).

Adding a Circuit Breaker to Your Panel
Section titled “Adding a Circuit Breaker to Your Panel”Step 1: Open the Component Library
Section titled “Step 1: Open the Component Library”- Click the Components button in the sidebar
- Open the Power category
- Find the Circuit Breaker component
Step 2: Drag to Your Panel
Section titled “Step 2: Drag to Your Panel”- Click and hold the Circuit Breaker icon
- Drag it over your Electrical Panel
- Drop it into a specific panel section
- The circuit breaker will snap into place horizontally within the section
💡 Tip: Circuit breakers can only be placed inside Electrical Panel components. If you don’t have a panel yet, add one to your canvas first!

Moving a Circuit Breaker
Section titled “Moving a Circuit Breaker”Repositioning Within a Panel Section
Section titled “Repositioning Within a Panel Section”To move horizontally within the same section:
- Click and hold the circuit breaker
- Drag it left or right within the panel section
- Release to place it in the new position
- Other breakers will automatically adjust their positions
To move to a different section:
- Click and hold the circuit breaker
- Drag it up or down to a different panel section
- Position it horizontally where you want it
- Release to place it
To remove from the panel:
- Click the circuit breaker to select it
- Press
DeleteorBackspaceon your keyboard
⚠️ Note: When you move a circuit breaker, any wires connected to it will automatically adjust to follow the component.
Editing Circuit Breaker Properties
Section titled “Editing Circuit Breaker Properties”Opening the Properties Panel
Section titled “Opening the Properties Panel”- Click on the circuit breaker to select it
- The properties panel appears on the right side of the screen
- Or double-click the circuit breaker to open properties
Configuring the Amperage Rating
Section titled “Configuring the Amperage Rating”The most important property of a circuit breaker is its amperage rating - this determines how much current it can handle before tripping.
To change the amperage:
- In the properties panel, find the Amperage dropdown
- Click to see available options:
- 2A - Small loads, specialized circuits
- 10A - General lighting circuits (default)
- 16A - Standard outlets, general purpose
- 20A - Kitchen outlets, bathroom circuits
- 32A - Electric water heaters, large appliances
- Select the appropriate rating for your circuit
💡 Choosing the Right Amperage:
- Lighting circuits: Use 10A or 16A
- Standard outlets: Use 16A
- Kitchen/bathroom outlets: Use 20A
- High-power appliances: Use 20A or 32A
- When in doubt: Match the breaker rating to the wire size and expected load
Changing the Label
Section titled “Changing the Label”- In the properties panel, find the Label field
- Click in the field and type a descriptive name
- Examples: “Kitchen Outlets”, “Living Room Lights”, “Water Heater”
- The label helps identify which circuit the breaker protects
📝 Best Practice: Use clear, descriptive labels that indicate the room and circuit type (e.g., “Master Bedroom - Outlets” or “Kitchen - Dishwasher”).
Wiring a Circuit Breaker
Section titled “Wiring a Circuit Breaker”Circuit breakers have 4 connection terminals that you’ll need to wire:
Understanding the Terminals
Section titled “Understanding the Terminals”Input Terminals (Top):
- L-IN (Red) - Line input - connects to the main power supply in the panel
- N-IN (Blue) - Neutral input - connects to the neutral bus in the panel
Output Terminals (Bottom):
- L-OUT (Red) - Line output - connects to the hot wire of your protected circuit
- N-OUT (Blue) - Neutral output - connects to the neutral wire of your protected circuit
Connecting the Input (Power from Panel)
Section titled “Connecting the Input (Power from Panel)”To wire the power input:
- Select the Wire tool from the toolbar (or press
W) - Click on the main power terminal in your electrical panel
- Click on the L-IN terminal (red, top-left) of the circuit breaker
- Repeat for the neutral connection:
- Click the neutral bus in the panel
- Click the N-IN terminal (blue, top-right) of the circuit breaker
Connecting the Output (To Your Circuit)
Section titled “Connecting the Output (To Your Circuit)”To wire to protected devices:
- Use the Wire tool again
- Click the L-OUT terminal (red, bottom-left) of the circuit breaker
- Click the line terminal of your device (outlet, light, junction box, etc.)
- Connect the neutral:
- Click the N-OUT terminal (blue, bottom-right)
- Click the neutral terminal of your device
Multiple Devices on One Breaker
Section titled “Multiple Devices on One Breaker”You can connect multiple devices to a single circuit breaker:
- Wire from the breaker’s L-OUT to the first device
- From the first device, wire to the second device
- Continue chaining devices as needed
- Repeat for neutral wires (N-OUT)
Or use a Junction Box to split the circuit:
- Wire from the breaker to a junction box
- From the junction box, wire to multiple devices
- This creates a more organized “home run” layout
💡 Tip: In real electrical work, make sure the total load of all devices doesn’t exceed the breaker’s amperage rating!
Using Circuit Breakers in Simulation Mode
Section titled “Using Circuit Breakers in Simulation Mode”When you run a simulation in Elecplanner:
- Click on a circuit breaker to toggle it ON or OFF
- ON state (default): Power flows through to connected devices
- OFF state: Power is cut off, devices stop working
- Visual indicator shows the current state
This lets you test how your circuit behaves when breakers trip or are manually switched off.
Common Wiring Patterns
Section titled “Common Wiring Patterns”Pattern 1: Simple Light Circuit
Section titled “Pattern 1: Simple Light Circuit”Electrical Panel → Circuit Breaker (10A) → Light Switch → LightPattern 2: Outlet Circuit
Section titled “Pattern 2: Outlet Circuit”Electrical Panel → Circuit Breaker (16A) → Outlet → Outlet → OutletPattern 3: Appliance Circuit with Junction Box
Section titled “Pattern 3: Appliance Circuit with Junction Box”Electrical Panel → Circuit Breaker (20A) → Junction Box ├→ Kitchen Outlet ├→ Kitchen Outlet └→ DishwasherPattern 4: Multiple Breakers in One Panel
Section titled “Pattern 4: Multiple Breakers in One Panel”Electrical Panel├─ Circuit Breaker (10A) → Living Room Lights├─ Circuit Breaker (16A) → Bedroom Outlets├─ Circuit Breaker (20A) → Kitchen Outlets└─ Circuit Breaker (32A) → Water HeaterRelated Topics
Section titled “Related Topics”- Electrical Panel - Learn about panel setup and organization
- Differential Switch - Ground fault protection devices
- Junction Box - Organizing wire connections
- Wiring Basics - General wiring techniques
💡 Quick Tip: In real electrical installations, circuit breakers must be properly rated for the wire size and load. Always consult local electrical codes and hire a licensed electrician for actual installation work!

